Mac Outliner
Structured note taking for the Mac.
For many years I managed projects and products using an outlining application on my iPad. The problem with this was that the iPad app couldn't print and I needed to print. So I wrote myself a compatible application for Windows in C#. That worked out well and I gained the ability to both edit my outlines and produce reports for anyone that needed hardcopy (or just wanted a PDF).
Over time, I have upgraded to using My Life Organized, which is available of the PC and the iPad. Overall I have been happy with this, but it's over-kill for my needs and has some unfortunate restrictions with synchronising data between devices. It also does not have a Mac version, so I am forced to use the iPad version on the Mac and, yet again, forego printing.
As a result, I have embarked on a bit of a journey to create an outlining application for the Mac. There seem to be very few of them around so, if I want the functionality I need, I need to write it myself.
This is, by far, the largest and most complex application I have written for the Mac. The first version is functionally complete (no printing!) but, as yet, not extensively tested. As best I can tell, it's working and remains compatible with my old Windows program. That was a major design goal.
Key Learning Points
What did I want to achieve
At the most basic level, I felt the need to write something that couldn't be classified as trivial. I have written several complete apps, but nothing large or complex or, for that matter, for the Mac. Writing for the Mac was going to be a challenge. It is similar to writing for iOS, but different in so many ways.
So, my aims for this application:
- A substantial Mac application.
- Something that can open and update OPML files from the PC.
- A multi-window application, so I can have more than one file open at the same time.
- Recent File management, including retaining the location and size of the window.
- Implementing a tree structure in SwiftUI - no simple task!
- The use of Markdown with conversion to HTML for preview.
- Copy and paste of the data in the tree structure.
- Copy and paste structured data between windows, allowing me to copy whole structures between files.
- Handling XML data
As usual with my apps, my intention was to avoid using third party packages wherever possible.
What is in it
And the end result (so far) is...
This is what I have achieved so far. There is a lot of functionality wrapped up in the code, so I'll address components of the application below.


Details below...
Application Start
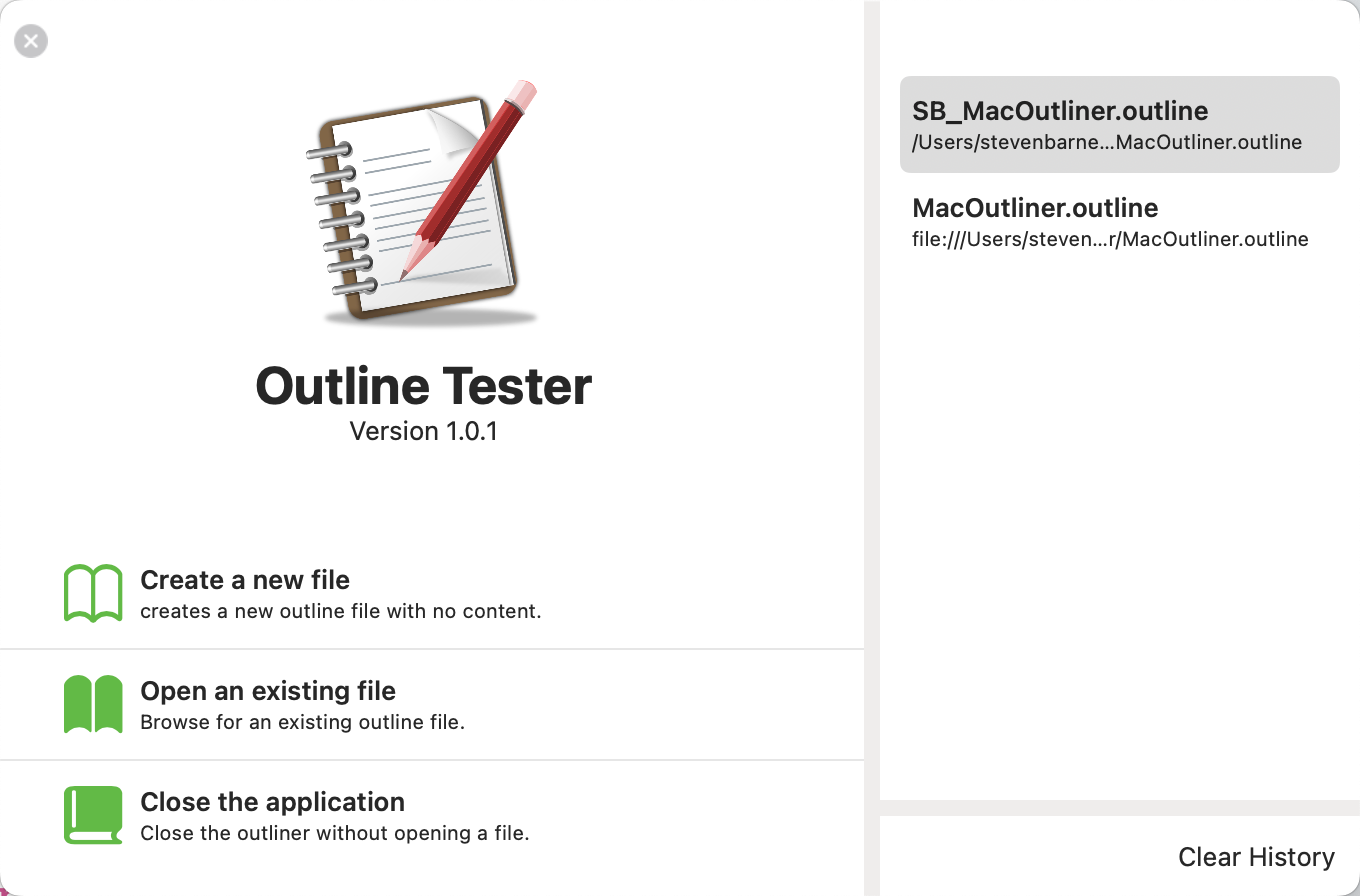
One of the things that irritate me in applications is the startup. Some just start up empty so you are forced to open an existing file or create a new one. Worse, some applications automatically re-open the last opened file. Granted, that can be helpful, but becomes less so when you're managing multiple outlines. So, rather than force my decisions on the user, I present an opening screen and let them decide what to do:
On the left, there are buttons to allow the user to create a new file, open an existing file or quit the application. On the right, I present a list of the most recently opened outlines. The user can double click one of these to open it. It's a simple, but effective, opening window.
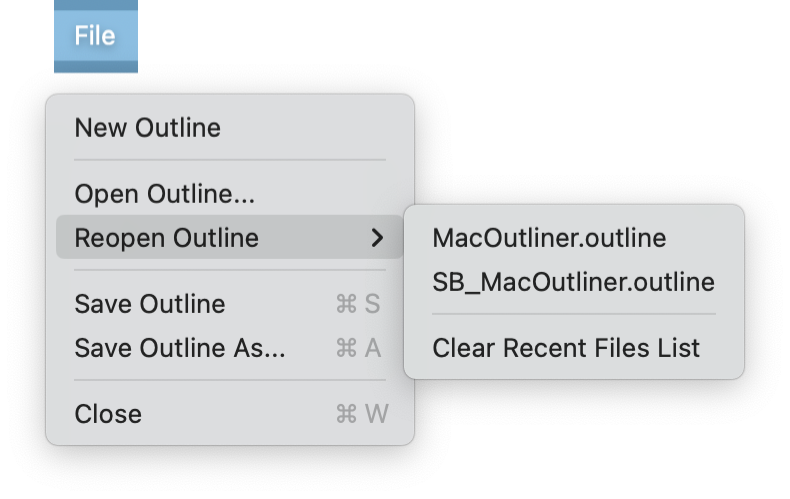
Once the application has started, you can access the list of recent files from the Open Recent menu item of the File menu.
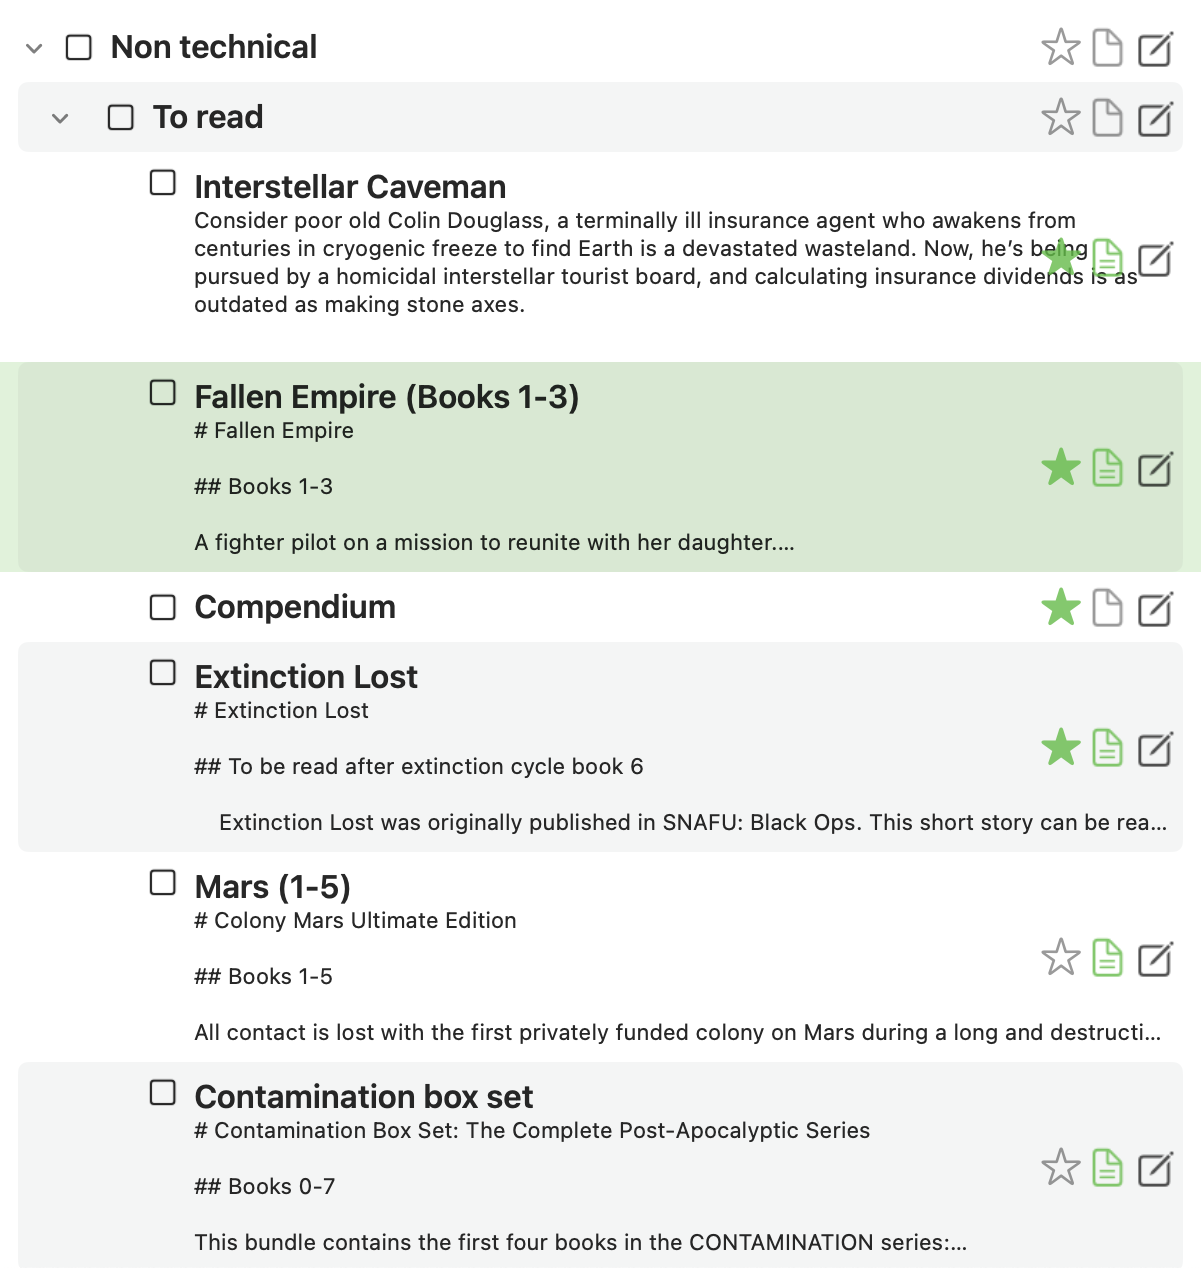
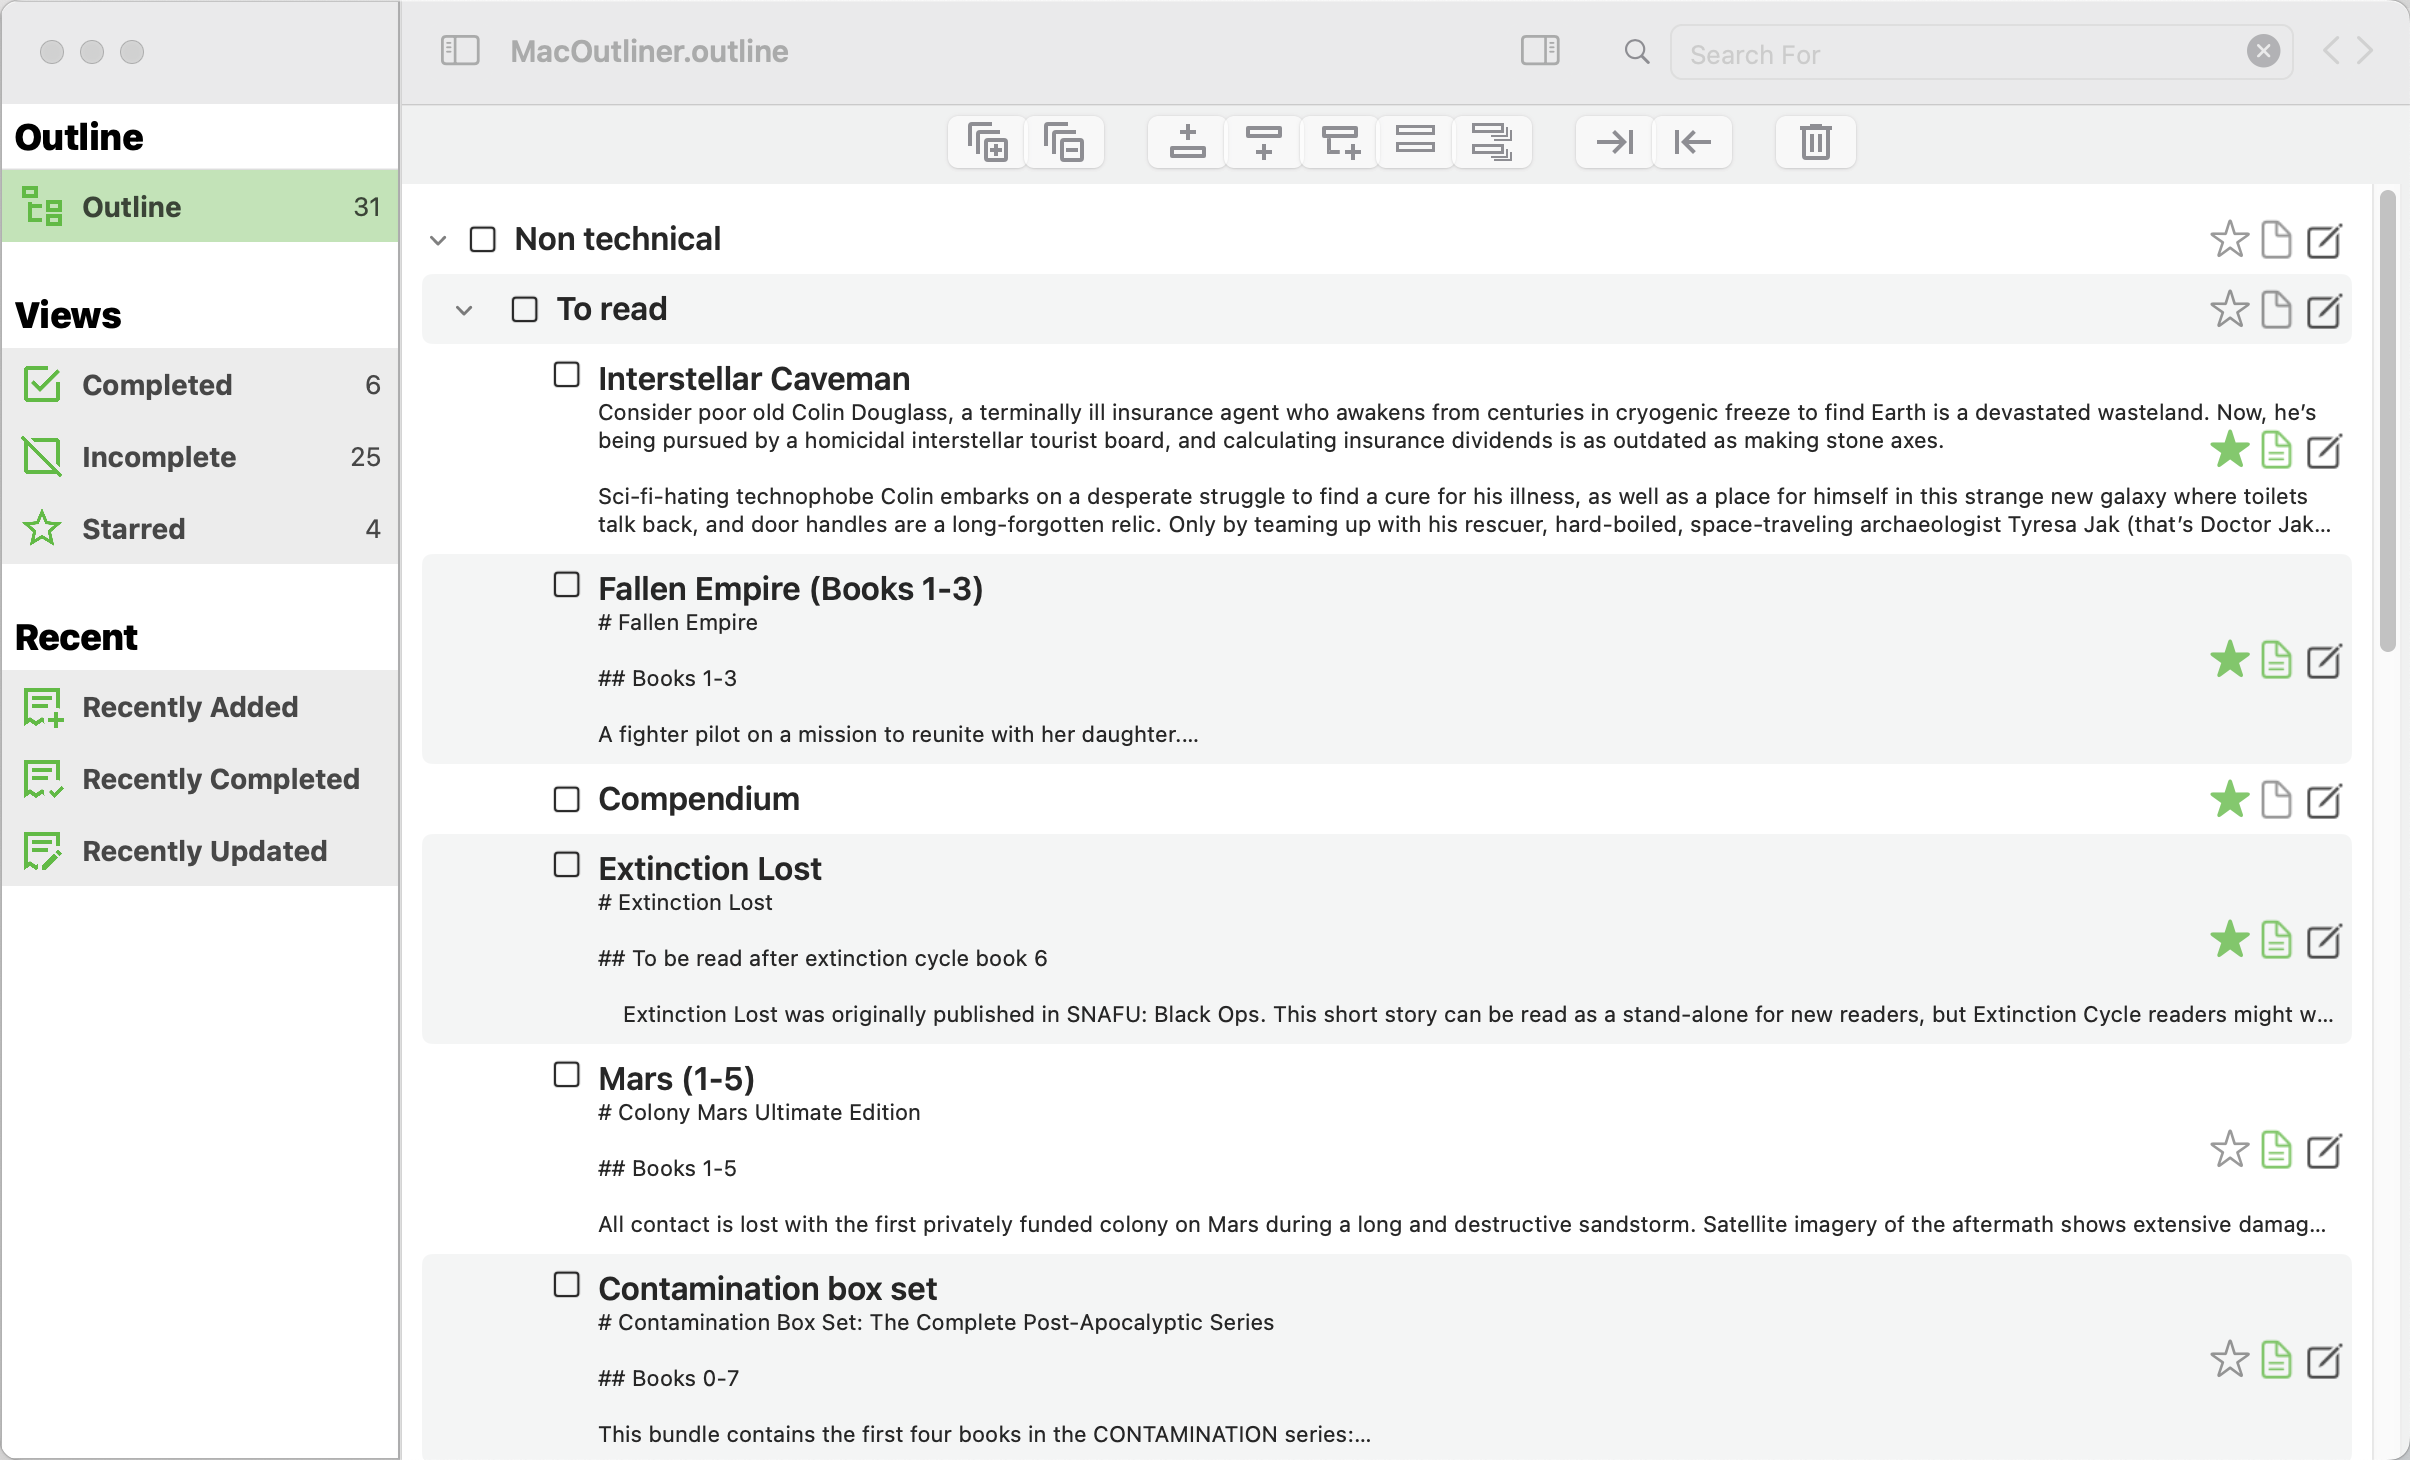
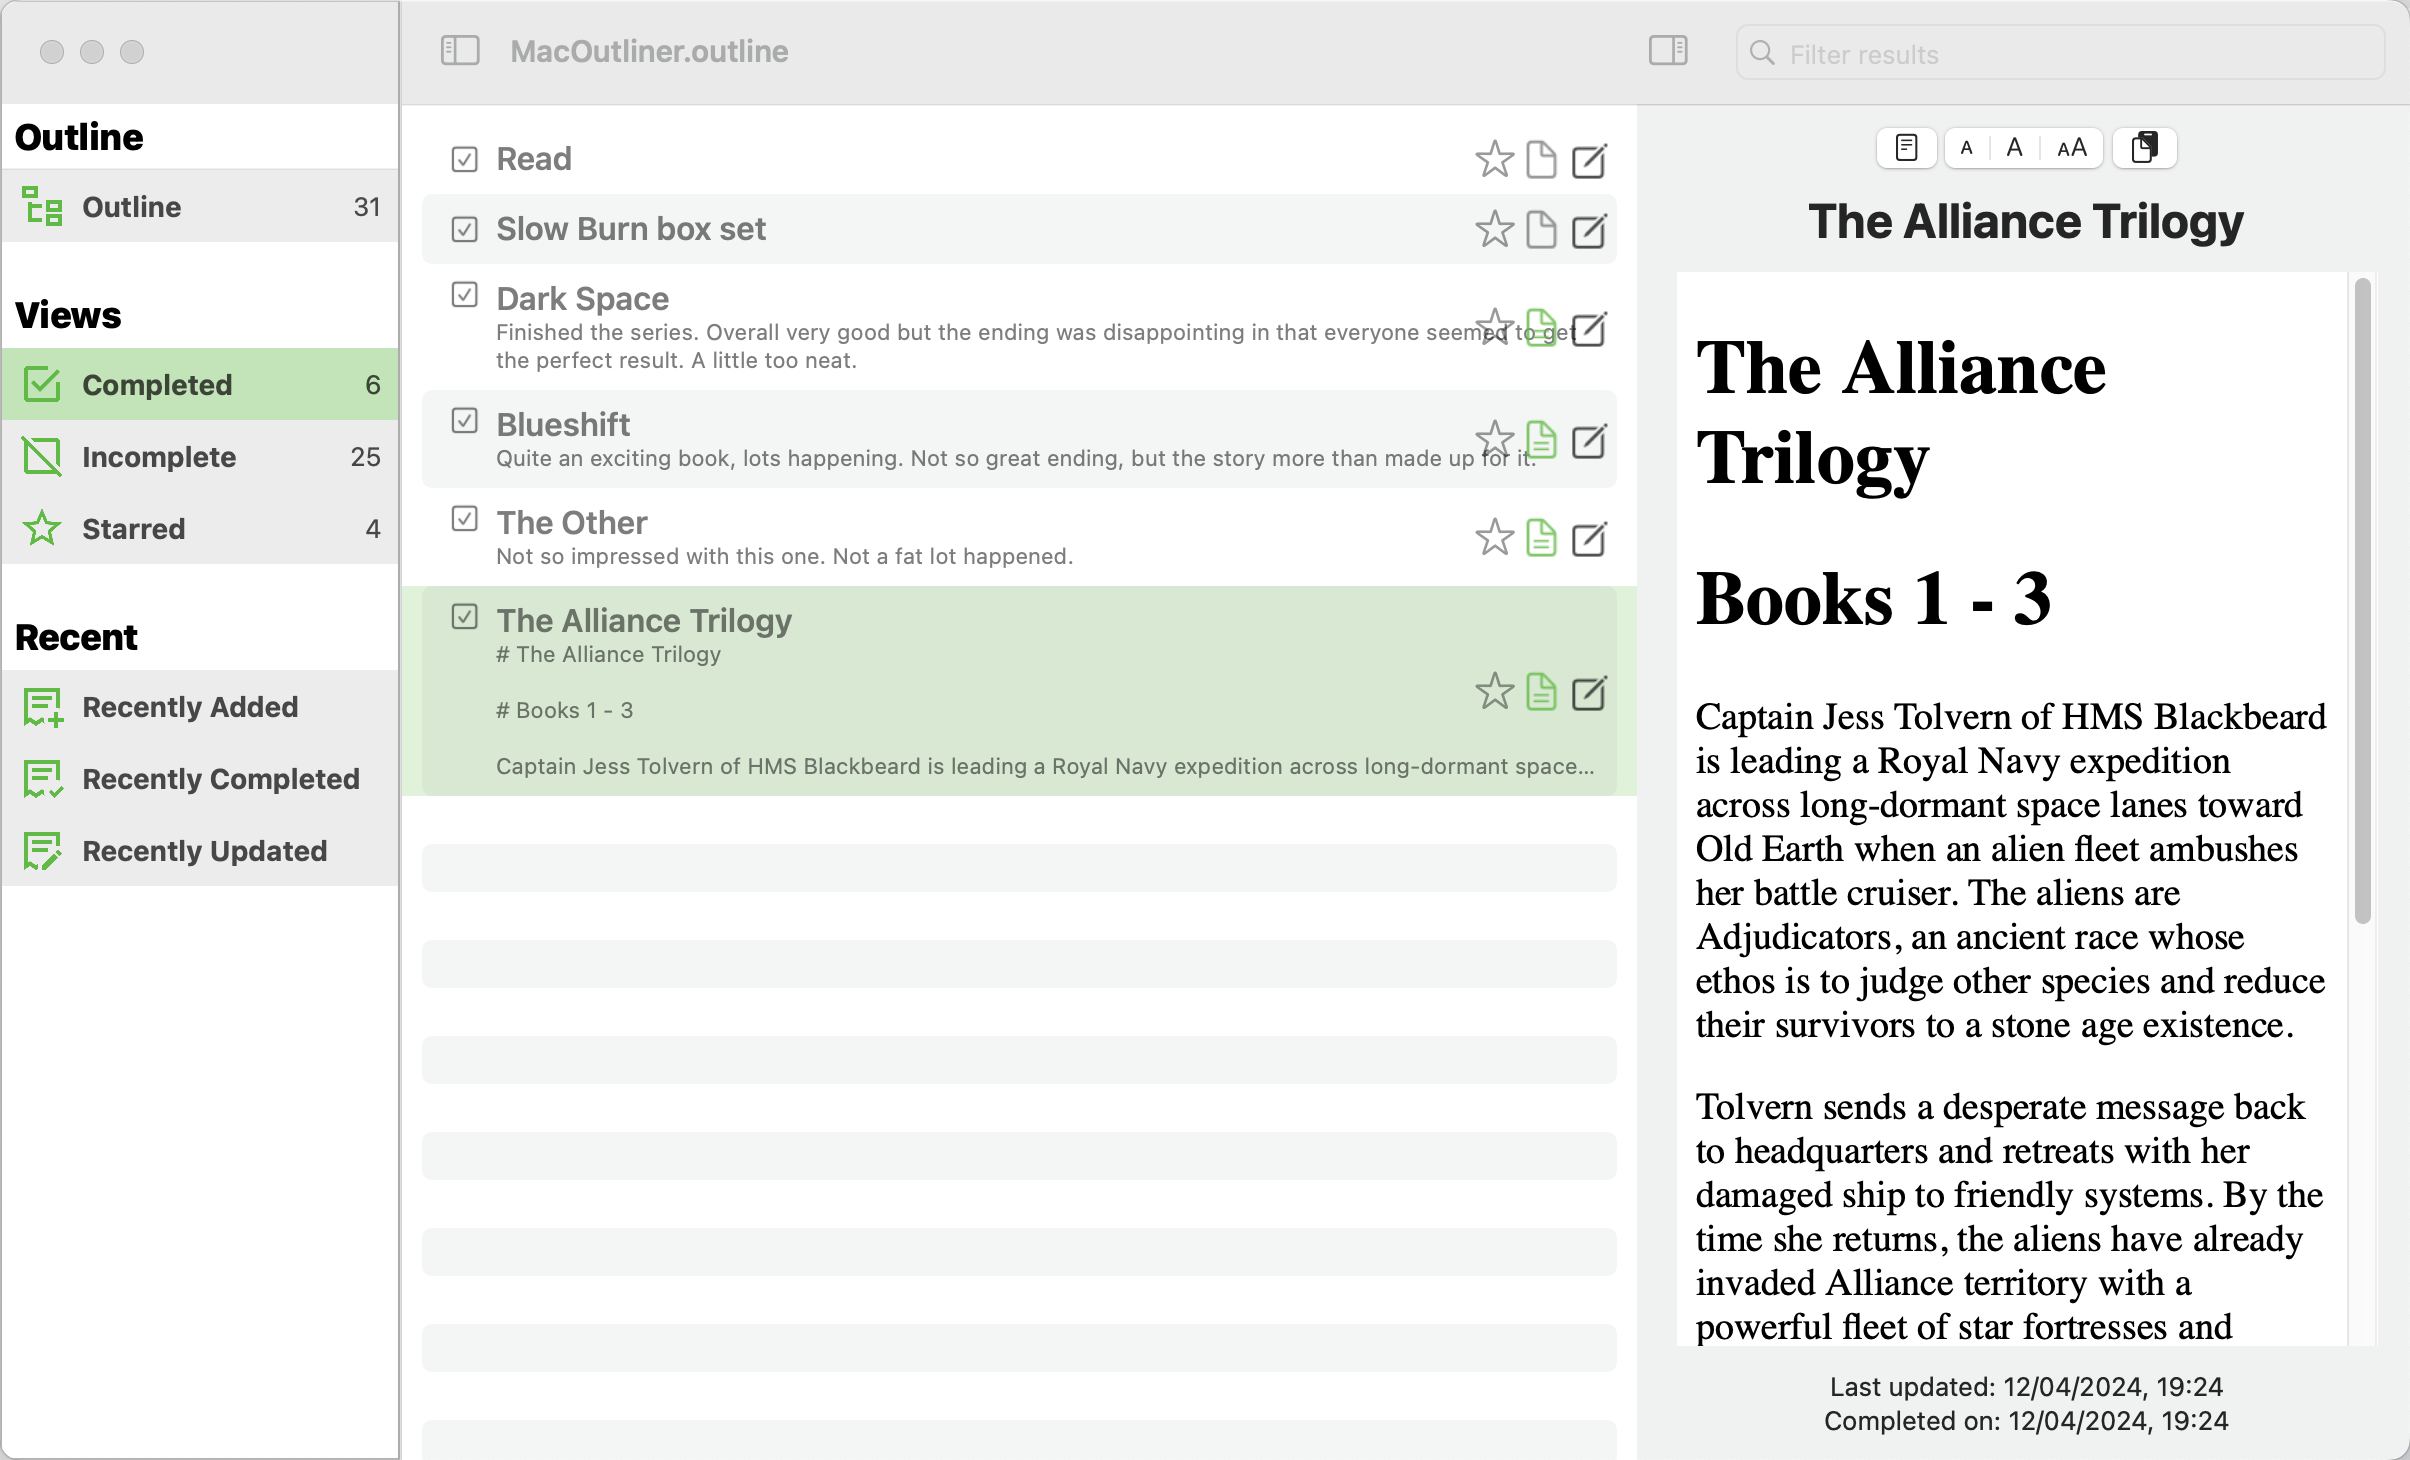
The Main Window
When a file is opened, the contents are loaded and the main window opens:
On the left are the filters that we can use to control how the outline is displayed. By default, the outline is shown. However, you can limit the display to
- Completed items
- Incomplete items
- Starred items
- Recently added items
- Recently completed items
- Recently updated items
On the right is the outline, showing the file structure. For each item, you can see the title and a few lines of the description. How many lines is determined by a system option.
Above the outline is a tool bar allowing you to:
- Expand the hierarchy
- Collapse the hierarchy
- Insert an item above the currently selected item, at the same level
- Insert an item below the currently selected item, at the same level
- Insert an item as a child of the current item
- Duplicate the current item
- Duplicate the current item and all of it's children
- Move an item to a lower level
- Promote an item to it's parent level
- Delete an item
Overlaying each item in the outline are three icons for the most used functionality. Using these icons you can toggle the starred state, popup a window with the formatted note or popup the item editor.
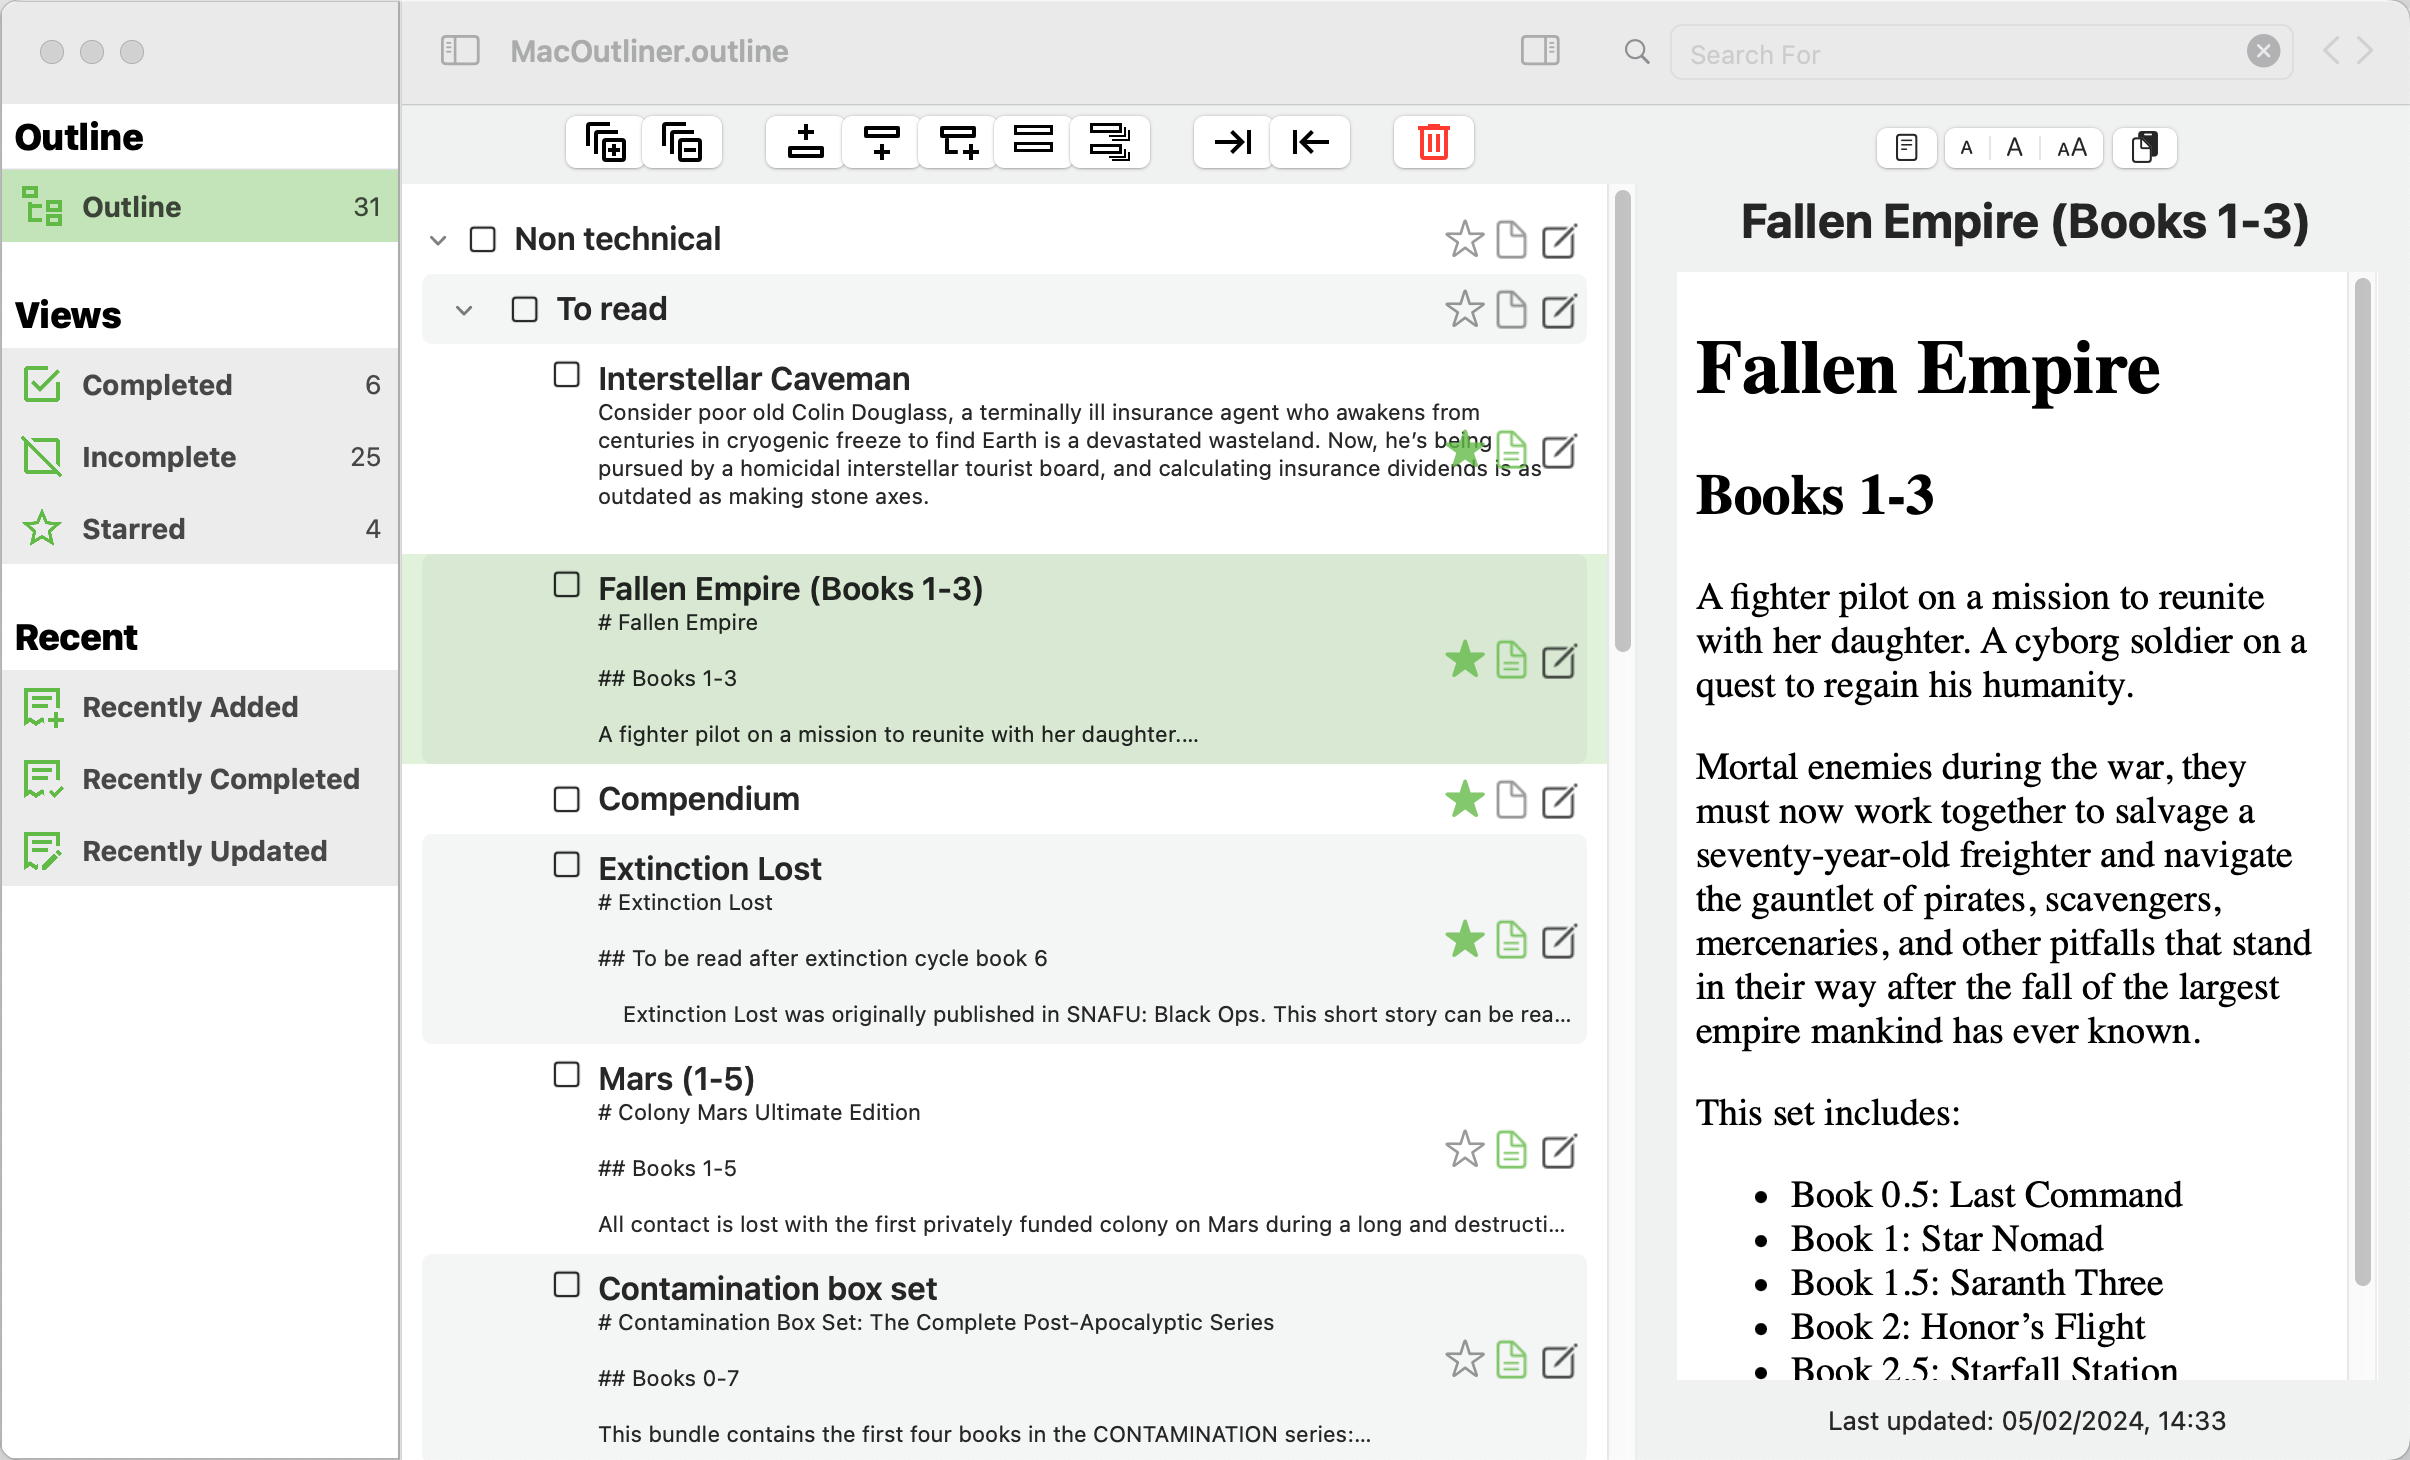
Main Window With Preview
While the structure is vitally important, the notes are where the detail lies, so there is an option to display a preview of the notes to the right:
Notes are plain text, but can be formatted in Markdown.
Since markdown is straight forward to write but less obvious to display, the preview pane shows the text formatted as an HTML web page. You can display the plain text if you want to, but the HTML typically looks better.
There is a splitter between the outline and the preview, so you can adjust the relative window sizes to suit your needs.
There are icons over the preview allowing you to switch between plain text and HTML view, to adjust the text size and to copy the text to the pasteboard.
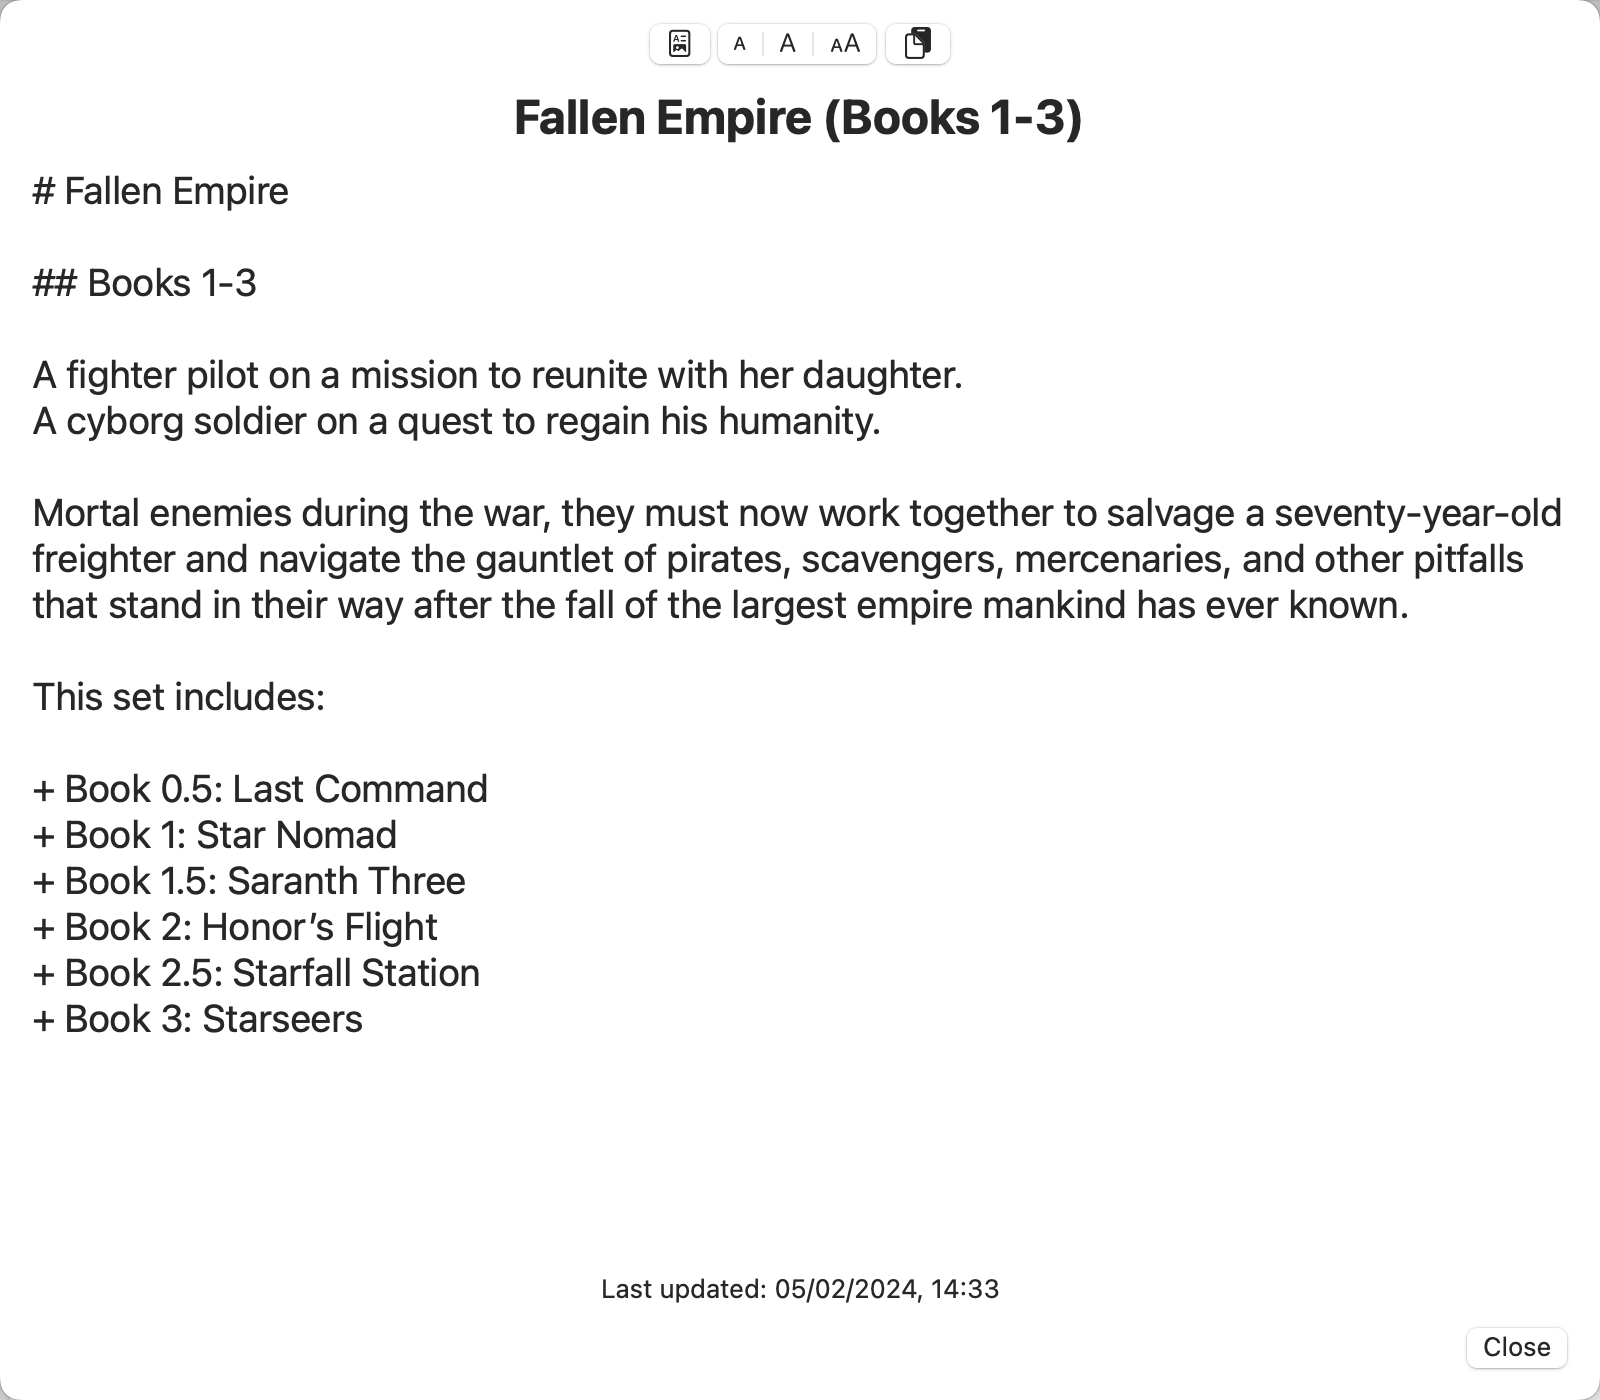
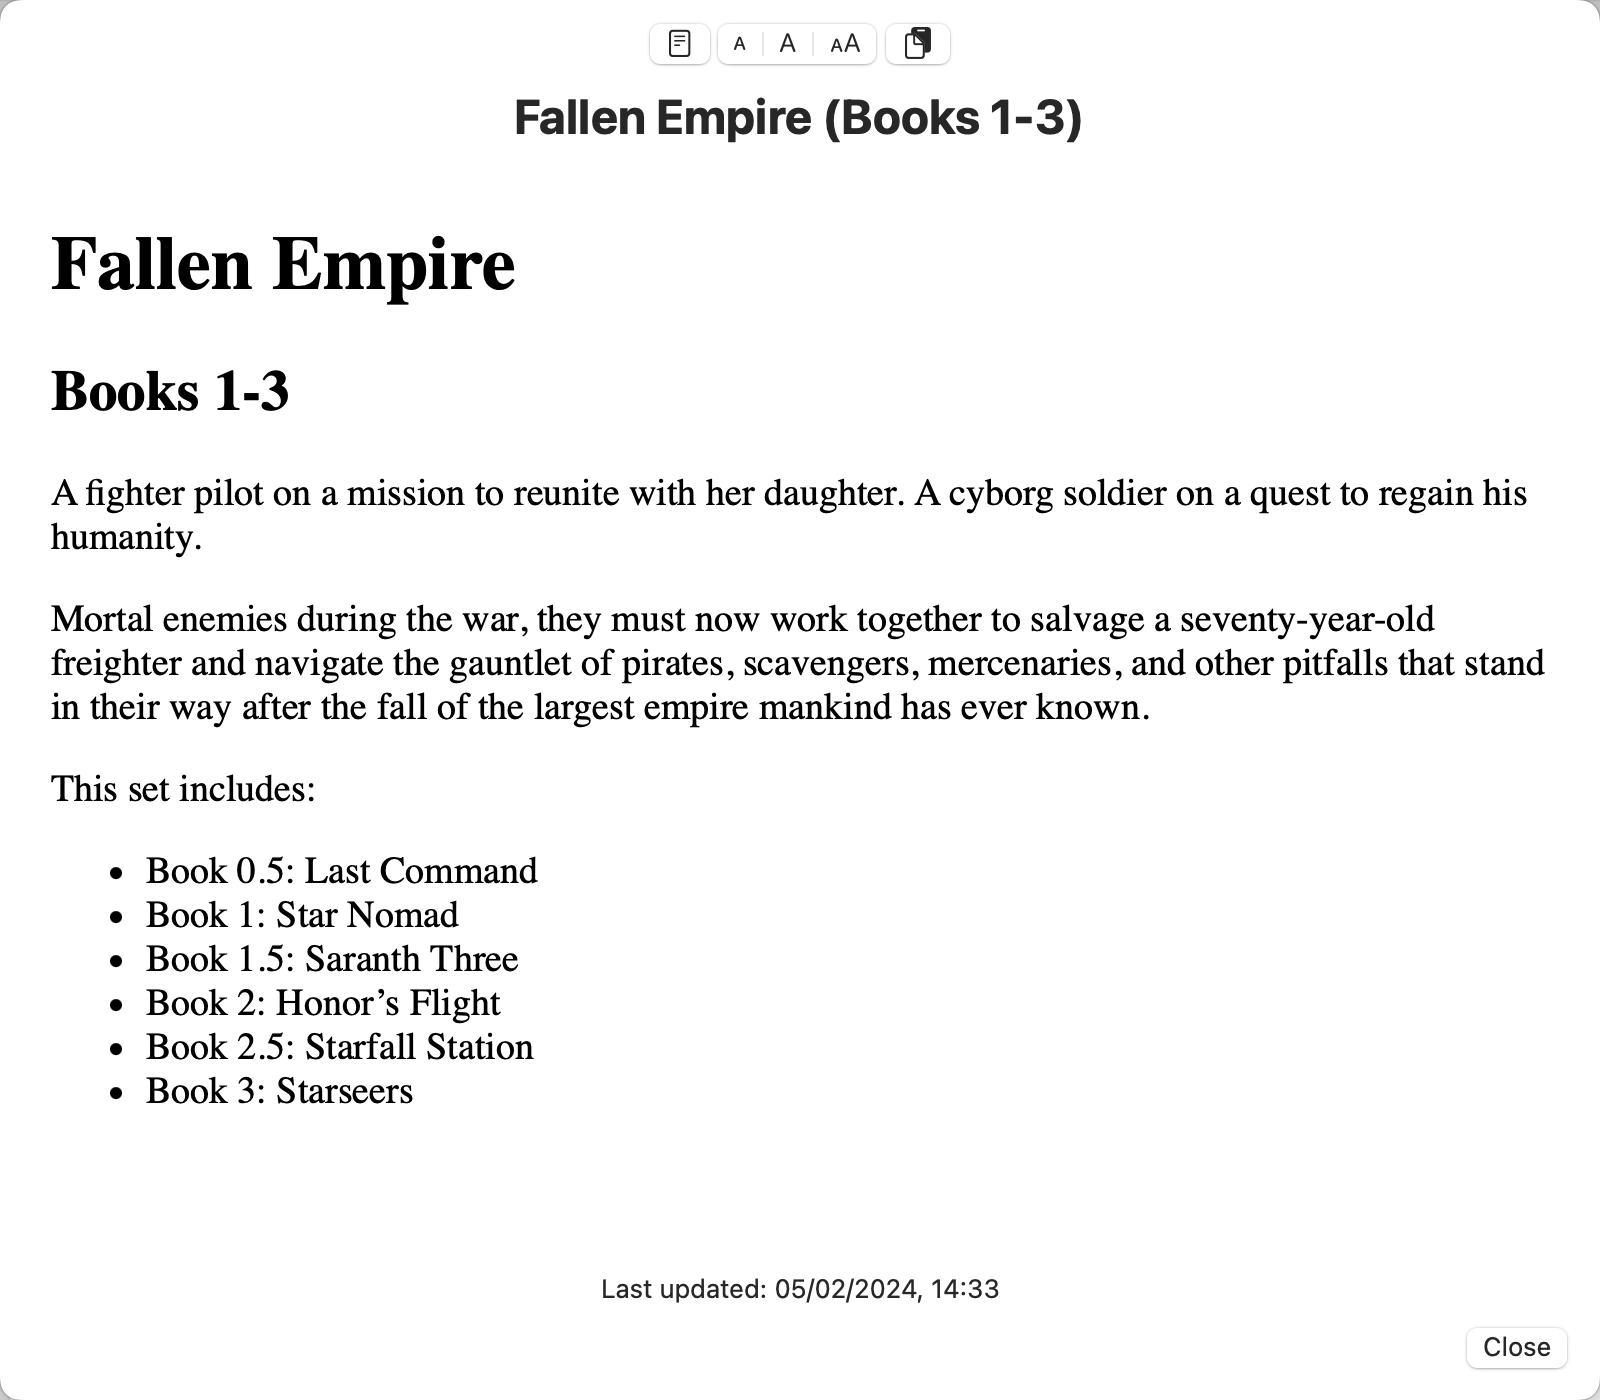
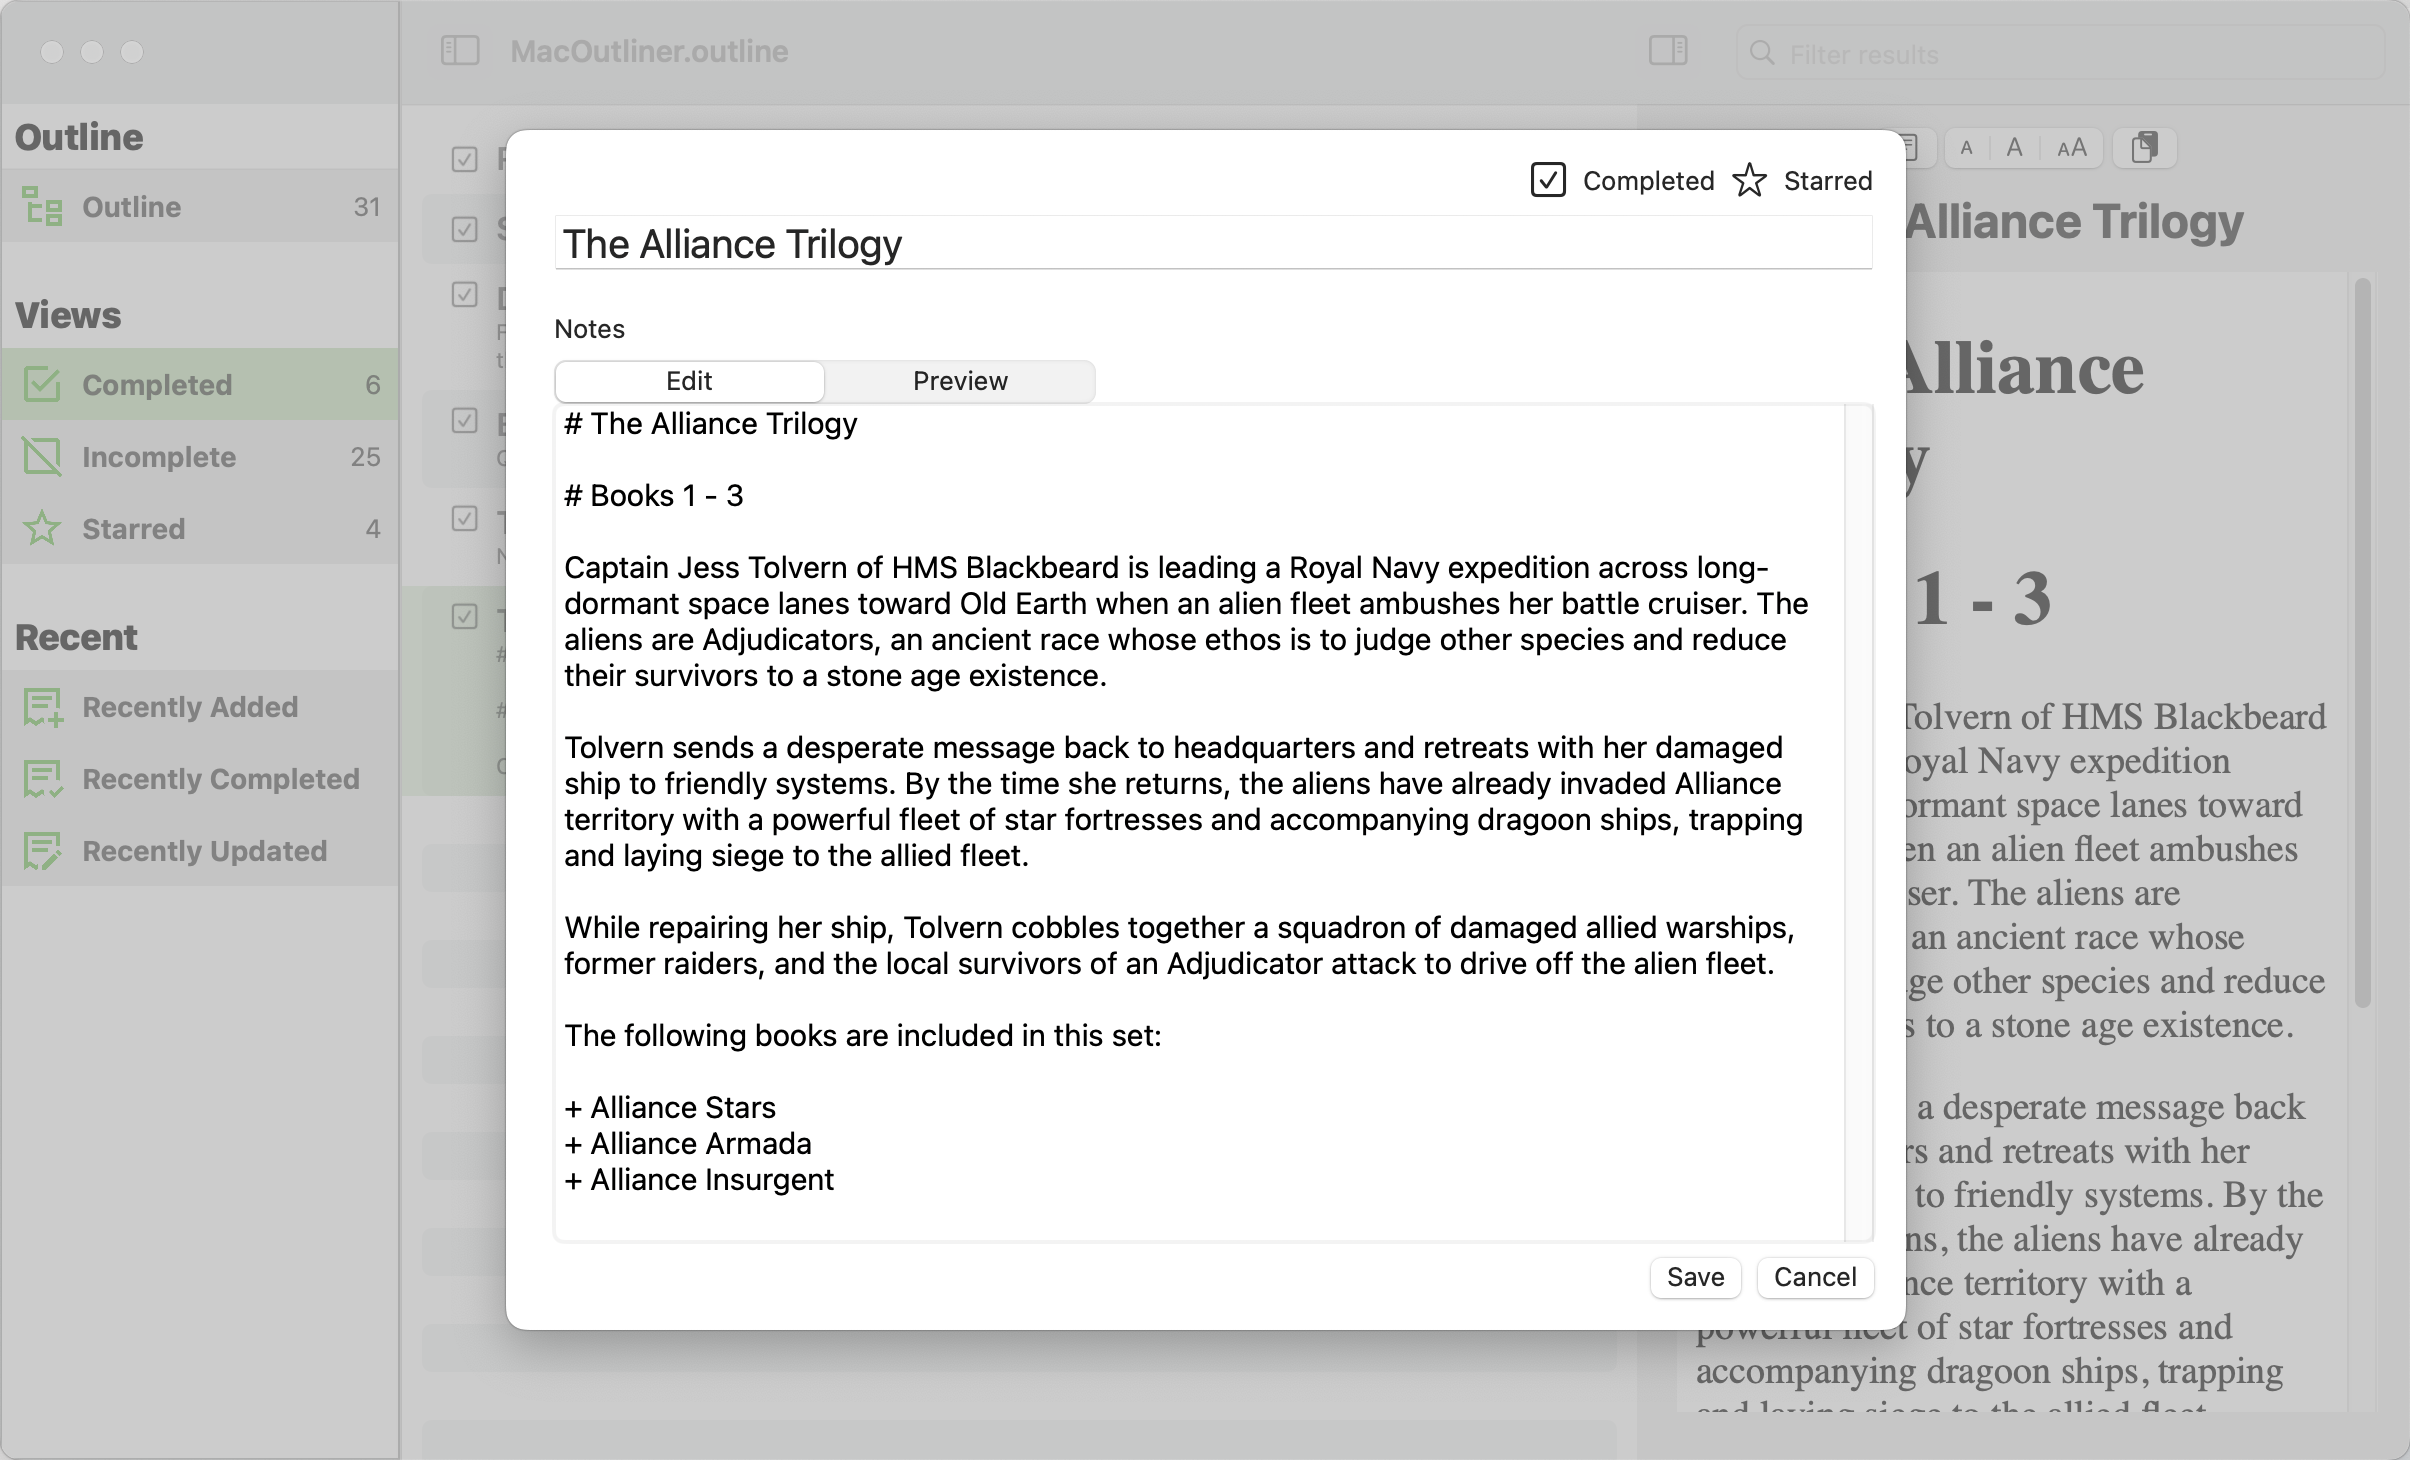
Item Editor
Individual items have been kept as simple as possible in order to keep the application simple. Essentially, an item consists of a title and a description (in Markdown format). The only other attributes of an item is it's starred state - a toggle switch which we can use in filters - and it's completion date.
Given the simple data, editing of an item is achieved using a simple editor window.
To aid with formatting notes, the note editor has a preview tab that can be selected to show the HTML formatted note.
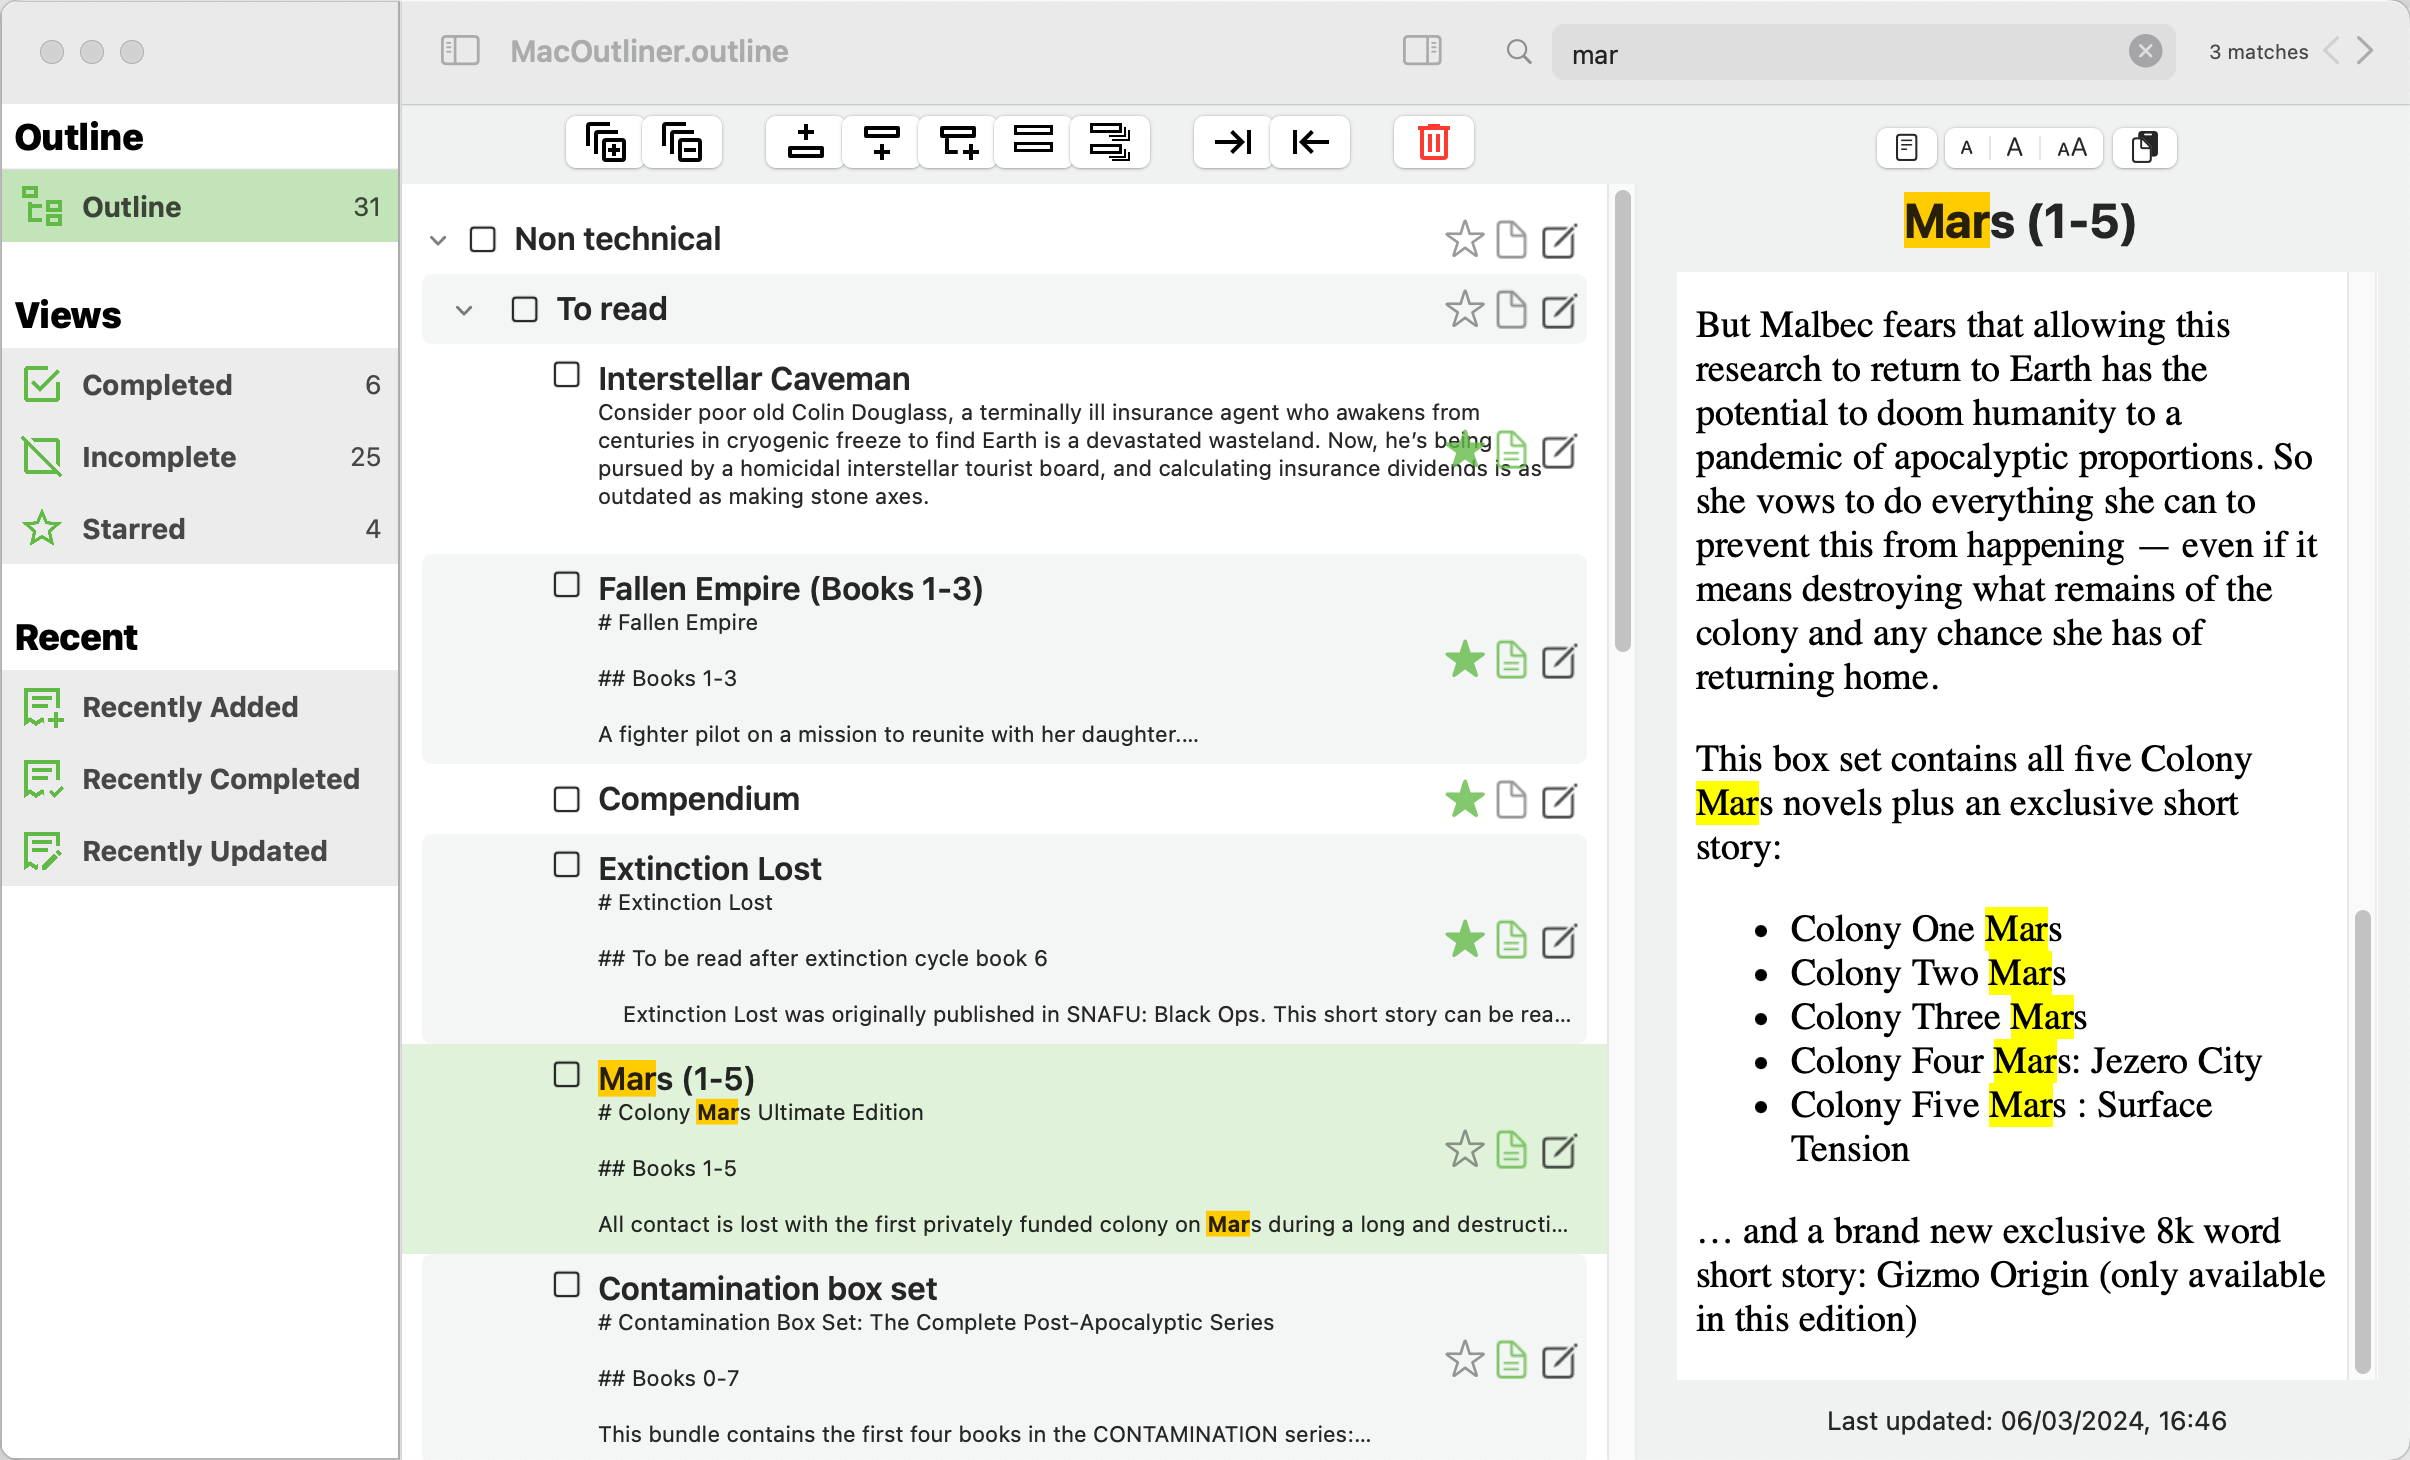
Finding Items
Having all this data is pointless if you cannot find the information you put in to it. To help with this, the title bar includes a filter box that you use to filter the outline or the lists.
As you type characters into the filter box, the outline is scanned for items that contain matching text. You control what is searched via the system settings. Items that match are highlighted and the preview, if open, is also highlighted. To the right of the search bar are buttons to scroll to the next or previous item.
If one of the list views is open, the list will be filtered to show only matching items.
Customising The Application
There are a small number of settings associated with the application. These are accessed via the Settings menu option.
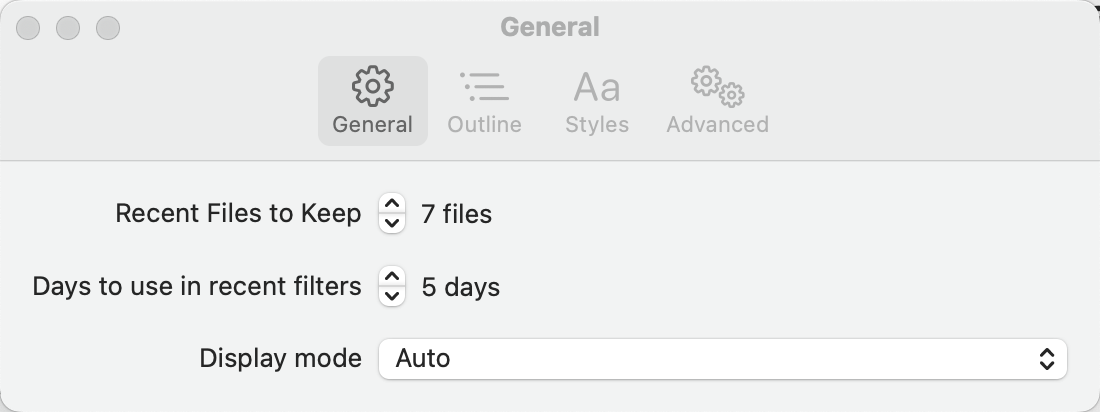
General settings allow you to determine how many files that appear in the recent files list on the opening screen and the reopen menu. The Days for Recent Items value controls how many days we want to use to determine how old an item is when applying one of the 'recent' filters. Finally, Display Mode determines whether the application works in light mode, dark mode or follows the current system state.
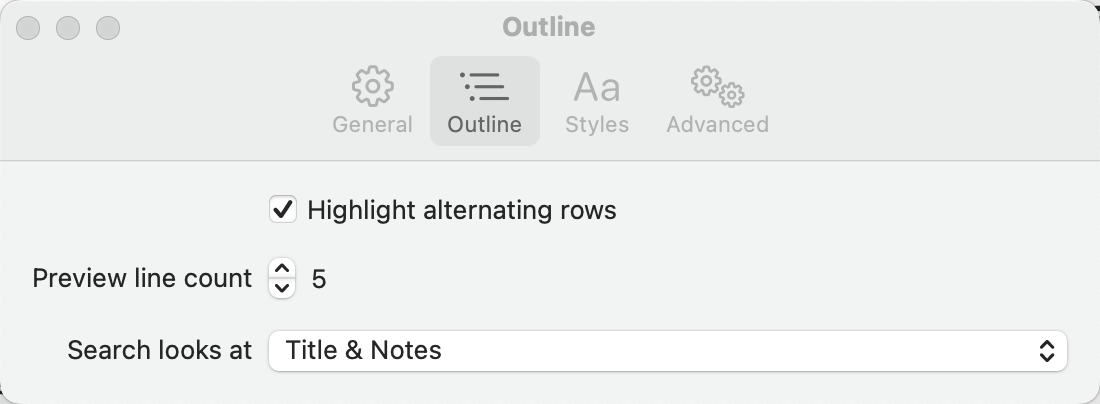
Outline settings affects how items are displayed and what is searched when a filter is applied. When Highlight Alternate Rows is checked, the background of each row is shaded to help provide clear differentiation between rows. From here you can also adjust the number of rows of preview text that are displayed in the items.
The final option determines what text is searched when you enter filter text in the filter box at the top of the window. You can choose between searching the title, the note or both.
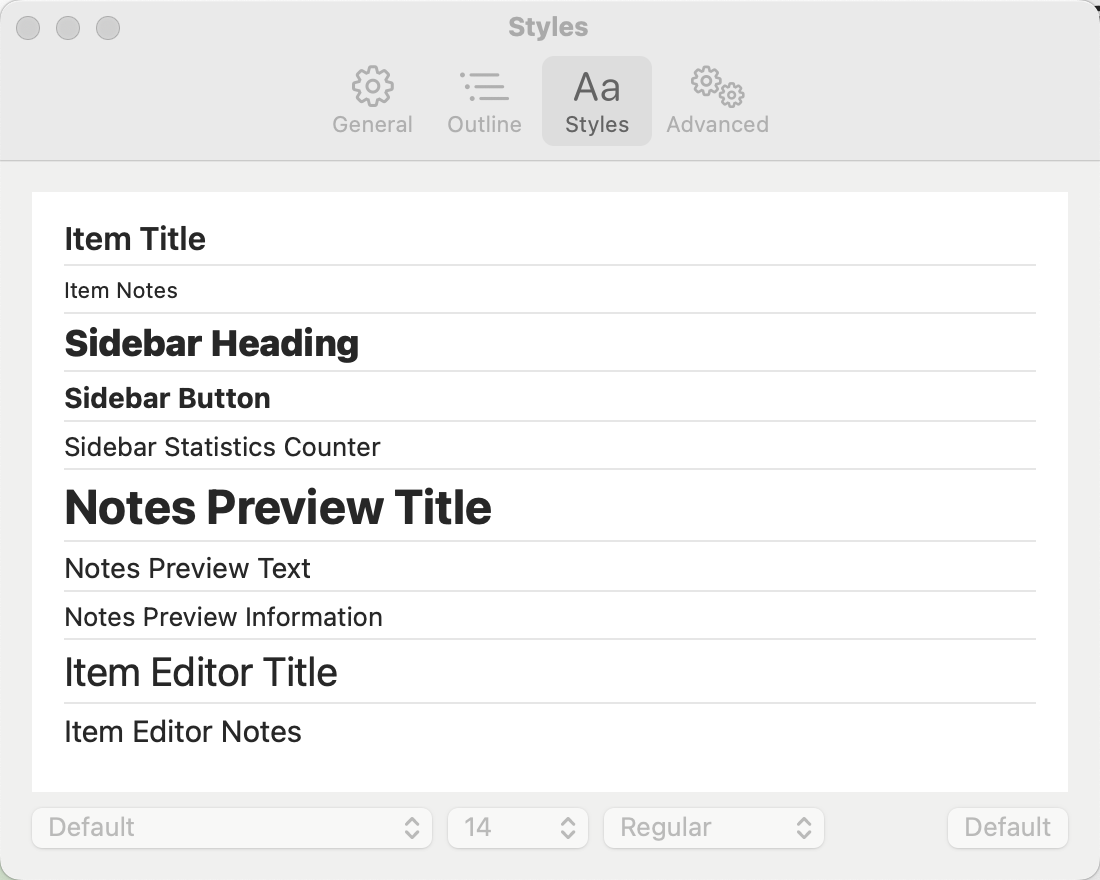
The styles settings give you an opportunity to edit the font characteristics for all aspects of the application. While most of the time the default settings will be fine, it makes life easier if you can customise text sizes.
There is only one advanced setting. Mac applications typically have two options that control what happens when you close the last open window. They either remain open to get you open a different file or they close with the last file. My preference is that the application closes with the last file, but I recognise that this is not necessarily the best option for everyone, so you can toggle this functionality in the advanced settings.
About The Application
No Mac application would be complete without an About Box. The free out-of-the-box window is fine, but I wanted better.
Source code
No secrets here
While this is a work in progress and the code hasn't really been thoroughly tested yet, I figure there is no reason not to share what I have written so far. I have plans for what I want to do with this app next and need to do a decent amount of testing. If you have a play with the source code, please bear that in mind. You can find the source code in my outliner repo.
Testimonials
Am I really any good?
Don't take my word for my abilities, take a look at other peoples opinions about me.

One very quickly runs out of superlatives with Steve. He is the cleverest person I know. He is highly innovative, passionate regarding the proper maintenance of agreed standards and protocols and establishes excellent relationships with our clients.

Steve is a rare developer resource who is able to provide a good breakdown of technical solutions for all audiences to understand... Steve understands the importance of project deliverable's both from a client and business perspective and shows a personal pride in ensuring the delivery schedules are met.

I have worked closely with Steve for his time with us and long before we formed our company. His technical ability far out-performs anyone I have known or met in companies we have worked with like IBM/EDS/Cap Gemini

Steven showed a great deal of commitment and skill when he worked with me. His attention to detail, comprehensive documentation and well thought out code, using very impressive technical standards meant that it was always possible to rely on the solutions provided being top notch. Steven is an asset to any company, at any level - if I were able to, I'd love to work with him again.

I have had the pleasure of working with Steven for several years in my role as CTO. He his one to the most multi-disciplined technically skilled developers I have known but what sets him apart is his eye for, and attention to detail, particularly when considering the user experience. I would absolutely not hesitate in recommending Steven.